Why do we need to test Android TV app
After Google introduced Android TV in 2014 and Apple released its tvOS in 2015 it became clear that there is an unseen market with great demand coming from our living room. Even though it’s still a young one, almost every company is trying to release its own TV app as soon as possible. It’s quiet understandable because as they say “the first man gets the oyster, the second man gets the shell”.
The TV app development is similar to the mobile development in many ways. Thus if you want to deliver high quality product to your target audience, you need to do comprehensive testing and to use the same QA processes as you would leverage for mobile app development. I won’t go into details of designing testing strategy for TV apps in this post - it’s completely up to you and your teammates. Instead, I’ll try to explain the key concepts of building automated infrastructure for Android TV app functional testing.
You may also want to check out one of my other posts about Automated Testing for Apple TV apps
What tool to use for Android TV testing
As I said before Android TV development is more or less similar to usual Android development. The same applies to the testing. You don’t need to invent a tool for that, there have already been wide range of them on the market.
The list of the tools for Android TV testing:
- Appium
- Espresso
- Robotium
- Calabash
- UiAutomator
Each tool has its own advantages and limitations but in this post I will be talking about the last one - UiAutomator. There are couple of reasons I prefer it over the others. It’s the native instrument, provided by Google, most of the developers are familiar with it and almost all automation tools are built on top of it. If you haven’t heard about it yet, you can check out my post about UiAutomator Essentials.
Differences from Mobile apps
On the lowest level mobile functional tests consist of finding elements, clicking/swiping/drag-and-dropping on them, changing or retrieving their attributes and verifying outputs. The same idea applicable to Android TV tests. There are some platform specifics though:
- Devices do not have touchscreen
- All actions are done using Remote control
- Screen is in landscape orientation only
- Most apps are aimed to video playback
The first two bullets are the ones which might cause difficulties in designing the framework. But I’ll try to explain dealing with them in further reading.
Navigating through Android TV app
Since Android TV devices do not have touchscreens the navigation should be done via special device - Remote controller.
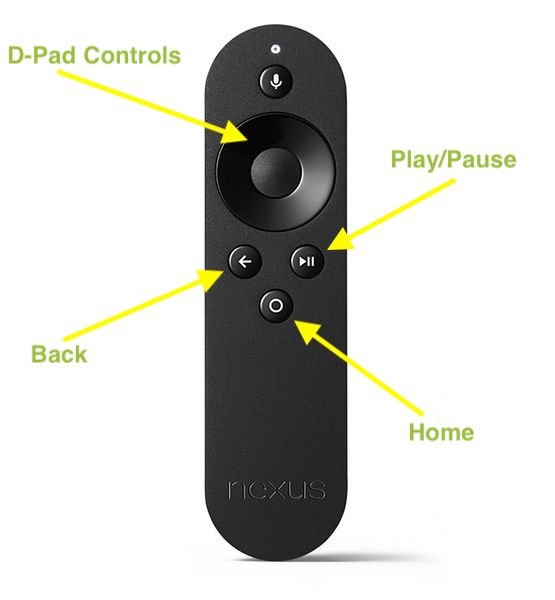
This is the first thing we have to consider while starting building our automation framework. UiAutomator allows us to use Remote in the way we want, providing a command for every particular interaction:
fun back() = device.pressBack()
fun menu() = device.pressMenu()
fun home() = device.pressHome()
fun playPause() = device.pressKeyCode(KeyEvent.KEYCODE_MEDIA_PLAY_PAUSE)

// D-Pad Controls:
fun left() = device.pressDPadLeft()
fun right() = device.pressDPadRight()
fun down() = device.pressDPadDown()
fun up() = device.pressDPadUp()
fun select() = device.pressDPadCenter()
Note: code snippets given in this post are written in Kotlin. If you want to start using this powerful programming language in your automation too, make sure you read this post about Kotlin in Android tests
Now when we know how to navigate in Android TV app, the next question would be “how to select elements we need?”. The answer is - the same way as we would do in manual testing. We’d need to find element, move focus to it and select it.
That said for successful navigation we’ll have to implement several additional methods for determination of focus state:
focusedreturns currently focused elementval focused: UiObject2? get() = device.findObject(By.focused(true))isFocusedchecks if particular element is focusedfun isFocused(selector: BySelector): Boolean = device.findObject(selector)?.isFocused ?: false- Some elements are not focusable, but they might contain focused element inside them.
hasFocuswill help us in those cases:fun hasFocus(selector: BySelector): Boolean = device.findObject(selector.hasDescendant(By.focused(true))) != null
Hence to select element we’ll need to move focus onto it first. Now, this part might be tricky in terms of automation. In other words we have to build focus movement path to the element. The more optimal path is the faster and more efficient is navigation through the app. Let’s discuss different approaches for finding path to the element.
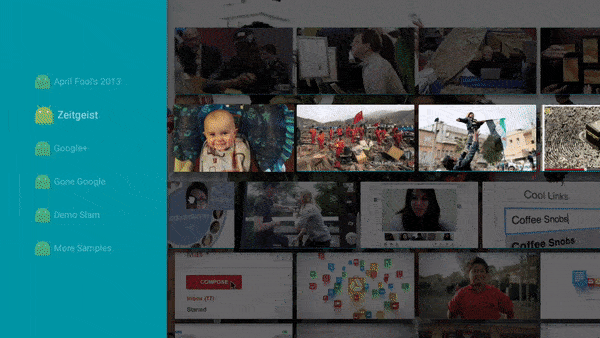
Strategies for finding elements in Android TV app
Finding element in the column
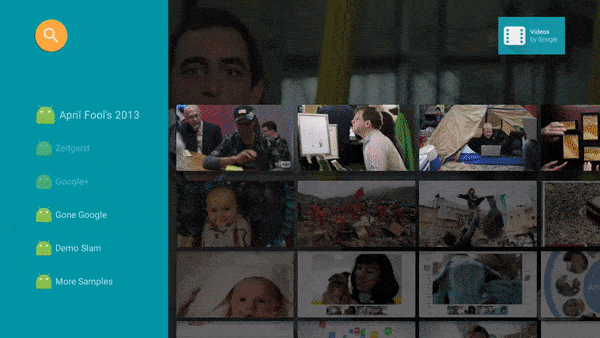
We’ll start from the easiest approach - finding element in column. Columns in Android TV apps are usually represented by menus of different kinds.
While searching for element in the column we should keep in mind couple of things:
- We can move either up or down only
- Element may be already focused
- Element might be located either above or below currently focused element
- We need to determine if the end of the column is reached
- Element might not be in the column at all
Considering all of the above we could build simple algorithm for finding element in the column of Android TV app:
fun findInColumn(by: BySelector) {
 var isEndReached = false
 while (!isFocused(by)) {
  val previous: UiObject2? = focused
  moveFocus(isEndReached)
  val current: UiObject2? = focused

  if (previous == current) {
   if (isEndReached) {
    throw RuntimeException("Element $by was not found")
   }
   isEndReached = true
  }
 }
 println("Element $by was found")
 select()
}

fun moveFocus(isEndReached: Boolean) =
            if (isEndReached) up() else down()
We are moving through the elements in the column checking if given element is focused. While doing that we check if the end of the column reached by comparing previous focused element with current one. If end is reached for the second time, which means all elements have been inspected, exception will be thrown.
Finding element in the row
Finding element in row is essential for the testing of Android TV. It’s so important because almost every app keeps its content in so called “shelves”. And user can navigate easily from one element to another the same way she would do in the real-world video store.
For finding element in the row we could use the same principles as for column look up. Actually our algorithm will look almost the same. The only thing we’d need to change is moveFocus method:
fun moveFocus(isEndReached: Boolean) =
                        if (isEndReached) left() else right()
This way we will inspect elements to both - left and right sides from the currently focused element.
Finding element in the grid
Vertical grid is the most difficult place to find elements because we have to move in three directions - left, right and down.
Several things to consider before actual search:
- The best place to start is the upper left/right element. Starting from it we won’t need to return to check if element was missed in the beginning
- Since in our case grid’s row is not completely visible, all elements in row should be inspected before switching to next one
- In the end of each row direction should be changed too
- Grid can be asymmetrical (last row is incomplete), which means we have to inspect both of its bottom elements
Schematically our algorithm would work like this:
1  -> 2  -> 3  -> 4  -> 5
                        |
                        v
6  <- 7  <- 8  <- 9  <- 10
|
v
11 -> 12 -> 13 -> 14 -> 15
   <-    <-    <-    <-
|
v
16 -> 17 -> 18
Schema example represents asymmetrical grid on purpose. When 15th element is reached(isEndReached = true), we will return to the 11th one and go down to search element in the last incomplete row.
Actual implementation would look like this:
fun findInGrid(by: BySelector) {
 var isMovingRight = true
 var previous: UiObject2? = null
 var current: UiObject2?
 var isEndReached = false

 while (!isFocused(by)) {
  moveFocus(isMovingRight)
  current = focused

  if (current == previous) {
   down()
   isMovingRight = !isMovingRight
   current = focused

   if (current == previous) {
    if (isEndReached) {
     throw RuntimeException("Element $by was not found!")
    } else {
     isEndReached = true
    }
   }
  }
  previous = current
 }
 println("Element $by was found!")
 select()
}

fun moveFocus(isMovingRight: Boolean) =
                      if (isMovingRight) right() else left()
The idea is the same we’ve seen in findInColumn. The key difference is switching from row to row when end of the first one is reached. Also test developer should foresee the case wherever grid is asymmetrical, inspecting both sides of the last row before throwing the exception.
Further optimizations
All algorithms in the post could be optimized. For instance, I prefer to increase number of steps of focus movement while element is not visible to speed up searching.
Also part of the code from each approach can be reused. As a matter of fact, I’m using the same method for all three strategies and differentiating them by created Direction enums.
As for grid search, whenever you are able to see the whole row, you can skip rows until you spot the particular element.
If you’re wondering how to build-in these approaches into your framework, I suggest to move “find methods” to BaseScreen class or even create dedicated Actions class for encapsulating all device actions. More on doing that can be found in my post - Page Object in designing test framework with UiAutomator.
Also the good practice is to run your tests on multiple devices simultaneously. It will help you to get faster feedback about any potential issues and thus decrease amount of resources needed for fixing it. If that’s what you need, you could read my article about Parallel Functional Android Tests.
In case you have other thoughts on optimization I’d love to hear them!

Comments