Why Spoon?
It’s a well known fact that Mobile Apps are the next big thing and no one argues their testing is really important nowadays. There are couple of open source tools allowing to run your functional mobile tests across multiple platforms in parallel to ensure the app runs as expected on different sets of OS versions, screen sizes and hardware configurations. But what if your application’s supposed to run only on one of those set?

Let’s imaging hypothetical situation. There is a team out there who’s developing FireTV application. For the moment there is only one versions of FireTV devices on the market. Test developers from the team implemented 100 functional UI tests. They’ve got 10 TV devices for testing purposes. Now, if they ran their tests with native instruments (i.e. UiAutomator and JUnit), they would get hundred of tests running on each of the 10 devices in parallel, which is basically waste of resources. Hence to get the most benefits from their amount of devices they would need to shard* those 100 tests to all of their devices. That way each of the them will get 10 tests and total time of execution might be decreased by a factor of 10 (in ideal case).
Sharding* is splitting the test suite into multiple threads, so they can be easily run as a group under the same Instrumentation instance and on the same device.
So how do we shard our tests with native tools like JUnit and UiAutomator? I would recommend Spoon for this. It’s easy-to-use lightweight tool, which main goal is to distribute execution of the tests, making their output more useful. Spoon will help you to shard and run your tests on multiple devices simultaneously with no-brainer. Let’s find out how to setup this useful tool.
Setup
Since we decided to leverage native Android tools for our testing and Gradle is the standard de-facto for all Android projects, we will use Spoon Gradle Plugin.
The first step would be the adding Spoon’s class path to top-level build.gradle file:
buildscript {
 // your configurations go here
 dependencies {
  // other dependencies go here
  classpath 'com.stanfy.spoon:spoon-gradle-plugin:1.2.2'
 }
}
The next thing to do is to configure app’s build.gradle. At first we will apply Spoon plugin and then configure Spoon task.
apply plugin: 'spoon'
// rest of your configuration
spoon {
 shard = true
}
shard=true means that Spoon will use its built-in auto sharding function and we won’t need to care about splitting our tests manually. More available settings can be found in the official documentation.
Now let’s check if we set up everything correctly. Run ./gradlew tasks under your project folder. We should be able to see Spoon’s tasks under Verification group, like it’s shown in the figure below:
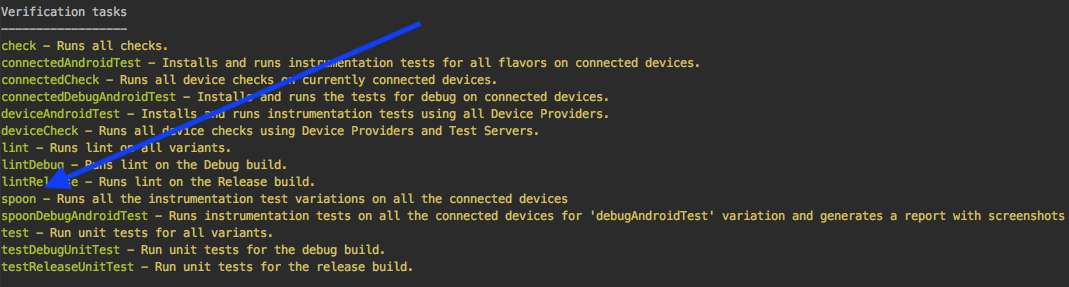
Assuming we were able to see those tasks, we’re ready to run our tests on multiple devices in parallel!
Parallel run
Spoon is designed as a tool for running all of your functional tests across all of the connected devices (i.e. visible by adb devices command). Thus if you plug in multiple different phones, tablets, TVs and start various emulators, you’ll get great diversity of the targets.
Be sure to unplug all not needed for tests devices and shutdown all non-target emulators before executing Spoon’s tasks.
./gradlew spoon
At this point our tests will be sharded across all connected Android devices and emulators.
Test reports
Besides being convenient and easy-to-use tool for parallel test run, Spoon’s also got some additional functionality, which might be useful for Test Developers.
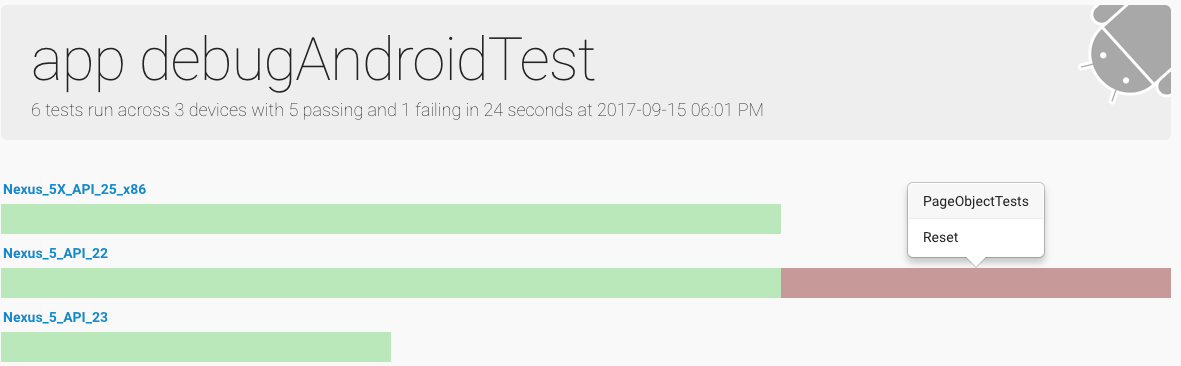
Once all tests have been completed, an HTML report will be generated with detailed info about tests and devices they were run on. Thanks to the high level data in reports we can determine right-away if the failure is specific to some device or to all of them. Also it provides device logs and optional screenshots.
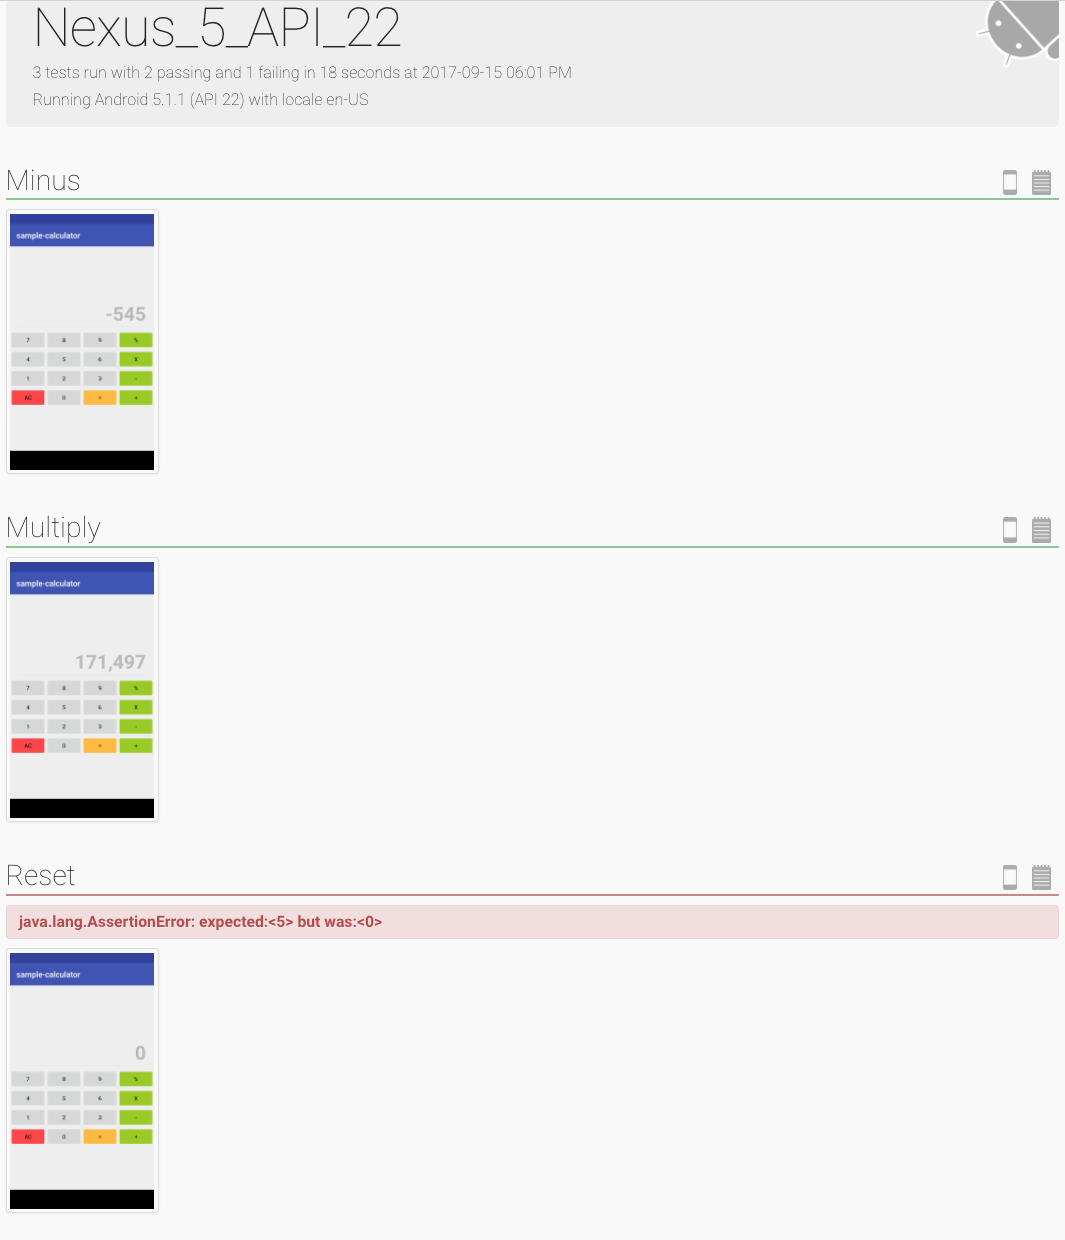
Screenshots
As I said before Spoon allows us to snap screenshots at any points while test is executed. Later they will be automatically included into test report HTML. This can visualize test execution and point to the potential bugs in your app.
To be able to take screenshots we’ll need to include Spoon dependency to app’s build.gradle:
dependencies {
 androidTestCompile 'com.squareup.spoon:spoon-client:1.7.1'
}
Furthermore since Spoon stores all taken screenshot in the device’s memory card, we’ll have to enable write storage privileges for our test app. This can be done in AndroidManifest.xml, which can be found under main folder in your project directory.
<manifest xmlns:android="http://schemas.android.com/apk/res/android"
 xmlns:tools="http://schemas.android.com/tools"
 package="io.github.alexilyenko.sample">
 <uses-permission android:name="android.permission.WRITE_EXTERNAL_STORAGE" />
 <!-- Rest of the Manifest goes below -->
</manifest>
Now all we have to do is to invoke static method Spoon#screenshot in our tests like this:
Spoon.screenshot(activity, screenshotName, testClassName, testMethodName)
Full example of invocation along with the retrieval of current activity can be found in GitHub repository. All examples are written in Kotlin, hence if you haven’t heard about this programming language I recommend to read my post about Android Tests in Kotlin.

Comments