Why Kotlin?
If you follow the latest trends in Android world or development in general, you’ve likely already heard about Kotlin. It’s a programming language, developed by JetBrains company, creator of Android Studio. Among its numerous advantages one can find proper functions, less of boilerplate code, no-overhead null-safety, smart casts and stream-like arrays. If you’re wondering what other pros and cons Kotlin has in comparison to Java, check out official documentation.
Besides that during the last Google I/O conference Android team officially announced support for Kotlin in Android projects. Obviously from now on language development will become more robust and largely scaled, allowing more and more Kotlin initiatives to appear in the nearest future. Meanwhile we, as Test Developers, can adopt this modern and powerful language in our day-to-day projects. Sounds sweet, right? Let’s start then!
Note: if you haven’t chosen the tool for your Android UI tests yet, I recommend to check out my post on UiAutomator and its essentials.
Android Studio Setup
Android Studio 3.0 ships with Kotlin bundled in, which means you will no longer need to worry about compatibility issues and installation of any extras. But since most of us is still using the second version of the popular IDE, we have go through some additional steps. No worries, it wont’ take long.
First of all, we’ll need to install Kotlin plugin. This can be done by navigating to Preferences > Plugins > Browse Repositories and searching for Kotlin keyword there. After that just click on the Install button like it’s shown in the figure
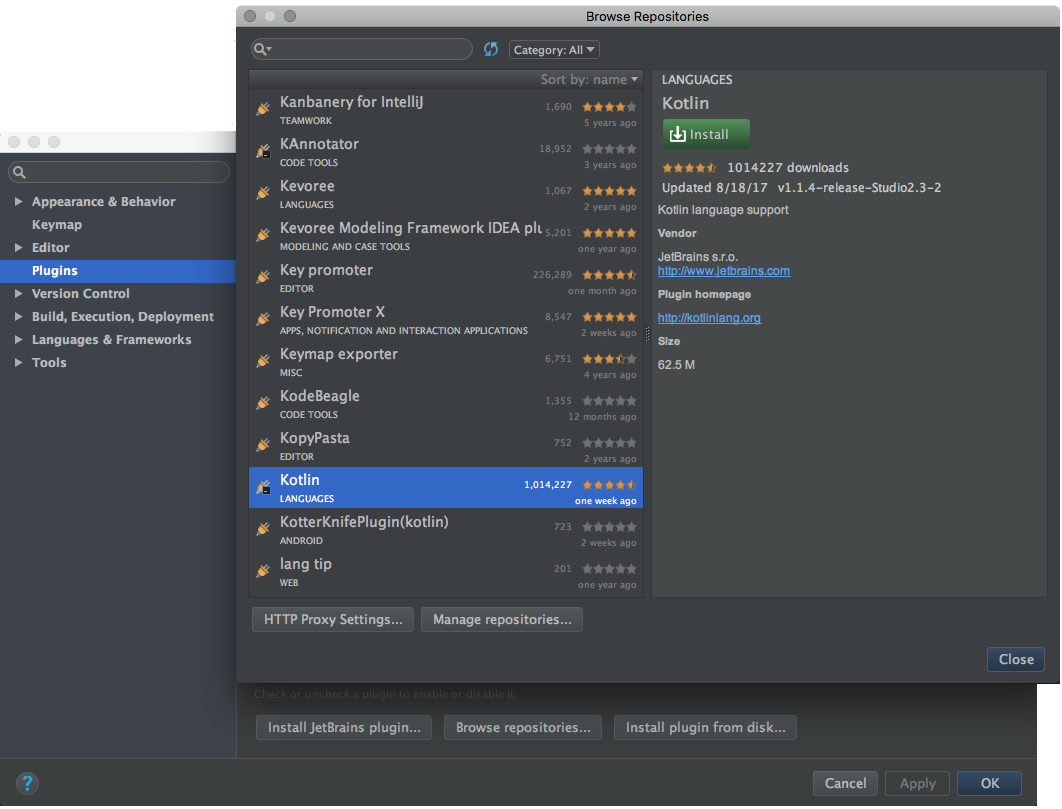
Kotlin and click on the Install button
After this has been done you’ll have to restart your Android Studio in order for plugin to work.
Note: in case you’re using IntelliJ Idea, you won’t need to worry about any installations, since IDE ships with Kotlin support enabled by default.
Project Setup
Next thing to do would be applying Kotlin plugin to both of your build.gralde files.
Adding Kotlin Gradle Plugin
To set up Gradle plugin we’ll need to modify buildScript, adding Kotlin plugin dependency, repository and version to it. After those manipulations our top-level build.gradle should look like this:
buildscript {
 ext.kotlin_version = '1.1.4-2' // find the latest version version at
                                   // https://github.com/JetBrains/kotlin/releases/latest
 repositories {
  jcenter()
 }
 dependencies {
  classpath 'com.android.tools.build:gradle:2.3.3'
  classpath "org.jetbrains.kotlin:kotlin-gradle-plugin:$kotlin_version"
  // other dependencies go here
 }
}
// rest of the configuration
Adding Kotlin dependency
To be able to use Kotlin in our Instrumentation tests we’ll have to apply Kotlin plugin and add its dependency as androidTestCompile value to our app build.gradle file. Here is what should be set there:
apply plugin: 'com.android.application'
apply plugin: 'kotlin-android'

// the rest of configuration

dependencies {
 // other dependencies go here
 androidTestCompile  "org.jetbrains.kotlin:kotlin-stdlib:$kotlin_version"
}
Changing source folder (optional)
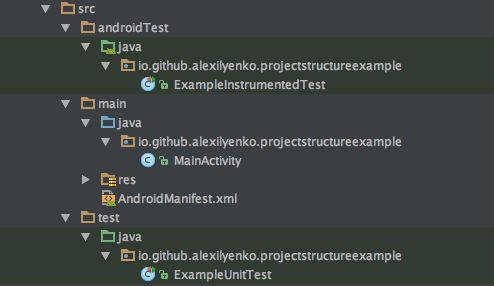
Default Android project structure is well-known to all mobile developers. Let’s take a look at it.
But since we’re going to use Kotlin instead of Java in our Instrumentation tests, won’t it have more sense to have source folder name to reflect that? This can be done by adding following line to your app build.grale:
android {
 // project configuration
 sourceSets {
  androidTest.java.srcDirs += 'src/androidTest/kotlin'
 }
}
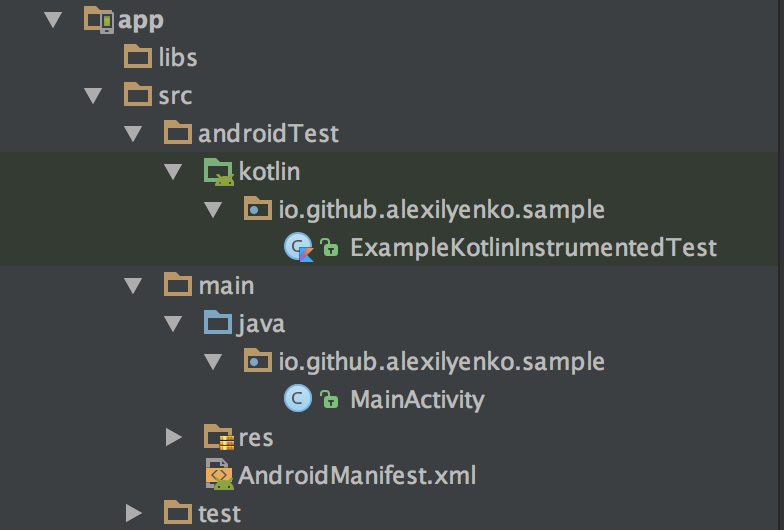
Finally our project overall structure will look like this
Test Example
Let’s create our first Kotlin test. Kotlin files have .kt extension and can be easily created in your project folder. Following simple example would be enough to ensure that everything set up correctly and Kotlin can be successfully leveraged in the further development.
@RunWith(AndroidJUnit4::class)
class ExampleKotlinInstrumentedTest {
 private val yourAppPackageName = "io.github.alexilyenko.sample"

 @Test
 fun useAppContext() {
  val appContext = InstrumentationRegistry.getTargetContext()
  assertEquals(yourAppPackageName, appContext.packageName)
 }
}
Converting Java to Kotlin
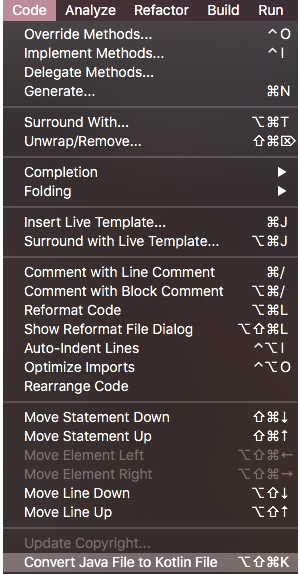
If you happen to have some tests already written in Java and you want to migrate them to Kotlin, I have good news! Kotlin Plugin also includes tool for easy converting sources from one language to another. It can be found by navigating to Code > Convert Java File to Kotlin File menu.
There could be some warnings after converting. But overall the tool does surprisingly great job and you may rely on it in your development.
Staying up-to-date with Kotlin version
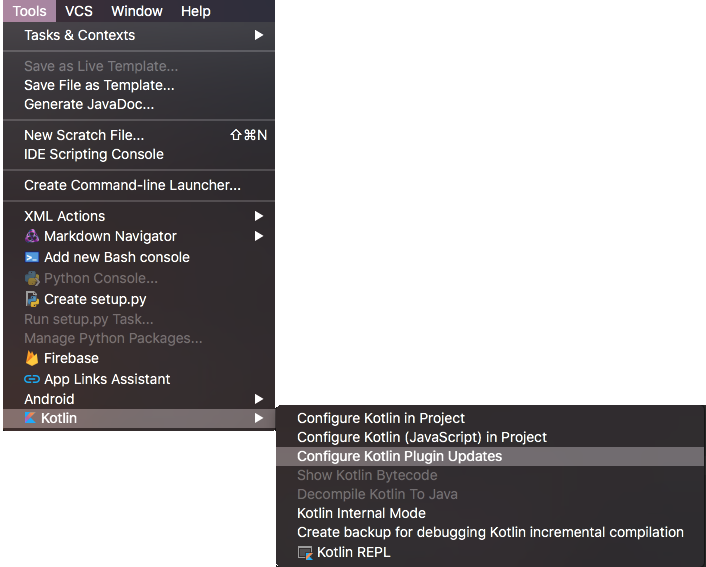
In spite of all its advantages Kotlin is still young language, that’s being constantly developed and changed. JetBrains team suggests everyone to stay up-to-date with new features and fixes. Android Studio plugin turns that into a no-brainer with simple channel switching under the Tools > Kotlin > Configure Kotlin Plugin Updates menu. You could choose one of the three channels available - Stable, Preview or Early Access.
At this point you should be able to start developing your Instrumentation tests in Kotlin. I’m sure you’ll love this powerful language and it’ll become your favorite tool for solving everyday problems. Happy coding!

Comments