Software patterns are like programming languages - you can not know them all. Well, yes, you could’ve read the Gang of Four’s book and learn most of them by examples given there. But Software Development is still a young industry, which has grown rapidly over the last decades allowing its subdivisions to create their own patterns and best practices. Test Development has got its own ones too, and Page Object is one of them.
The code examples in the post are written in Kotlin, but, of course, the concept applies to any programming language. All sources can be found in GiHub repository, which contains Android Calculator App and functional tests for it.
Note: if you haven’t heard about Kotlin yet, I recommend to read my article about this not so young powerful language and how it can be utilized in your automated Android tests.
What is Page Object Pattern
When you’re implementing your functional Android tests, the major part of your code will consist of interactions with elements from the app UI hierarchy, retrievals of their attributes and changes of their values. Let’s take a look at simple test of the Android Calculator app:
@Test
fun plus() {
 device.findObject(By.res("io.github.alexilyenko.sample:id/button_2")).click()
 device.findObject(By.res("io.github.alexilyenko.sample:id/button_add")).click()
 device.findObject(By.res("io.github.alexilyenko.sample:id/button_8")).click()
 device.findObject(By.res("io.github.alexilyenko.sample:id/button_calc")).click()
 val result = device.findObject(By.res("io.github.alexilyenko.sample:id/field")).text.toInt()
 assertEquals("Result should be equal to 10", result, 10)
}
Without explanation it’s really hard to understand what is going on here, right? It adds 8 and 2 by clicking buttons “2”, “8”, “+” and “=” and verifies the result. Even with simple actions like that readability is very poor. There are lots of inner unnecessary details exposed to the reader of the test.
Besides that we’re talking about functional tests, which means they depend on the UI layer of the app, and that one can be changed frequently. This could be a new design, changes of the text or attributes, restructuring of the buttons, fields or forms. And that most probably will impact our test.
Imagine the actual logic of the app is changed. For example, you need to press additional button before inputting each number or wait for some event on the “screen” of Calculator before making any calculation. It cannot be done by simple “Find-Replace” operation, you’ll have to actually go and add the line of code wherever it needs to be according to the new logic. Now, if you have only one test like that you might not consider this a big deal. But let’s be honest, usually it’s not the case. Regression suites usually contain tens or even hundreds of tests, and their maintenance in those cases can be painful.
So instead of having each test to deal with UI elements by itself, being vulnerable to any design/functional changes, Page Object pattern introduces decoupling layer.
All we need to do is to create an object which represents UI you want to test. This can be either the whole page on the device screen, or the part of it. Its responsibility would be to encapsulate all user interface interactions on the page and to contain all the UI elements (their locators) in one place. And that’s the place where changes are done in case of any app modifications.
Note: the name Page Object came from the Web UI Testing meaning the object, which represents current page. But since we’re mostly talking about native mobile apps, when we use UiAutomator, I prefer to call this pattern Screen Object, because it represents current activity (screen).
Advantages of Page Object
That said the main advantages of using Page Object pattern are:
- Tests are easy-to-read
- There is only one place you need to modify in case of app’s UI changes
- No duplication of the code, all locators and interactions are in the same place, allowing to reuse them
Fo example Page Object for Facebook app might be illustrated like this:
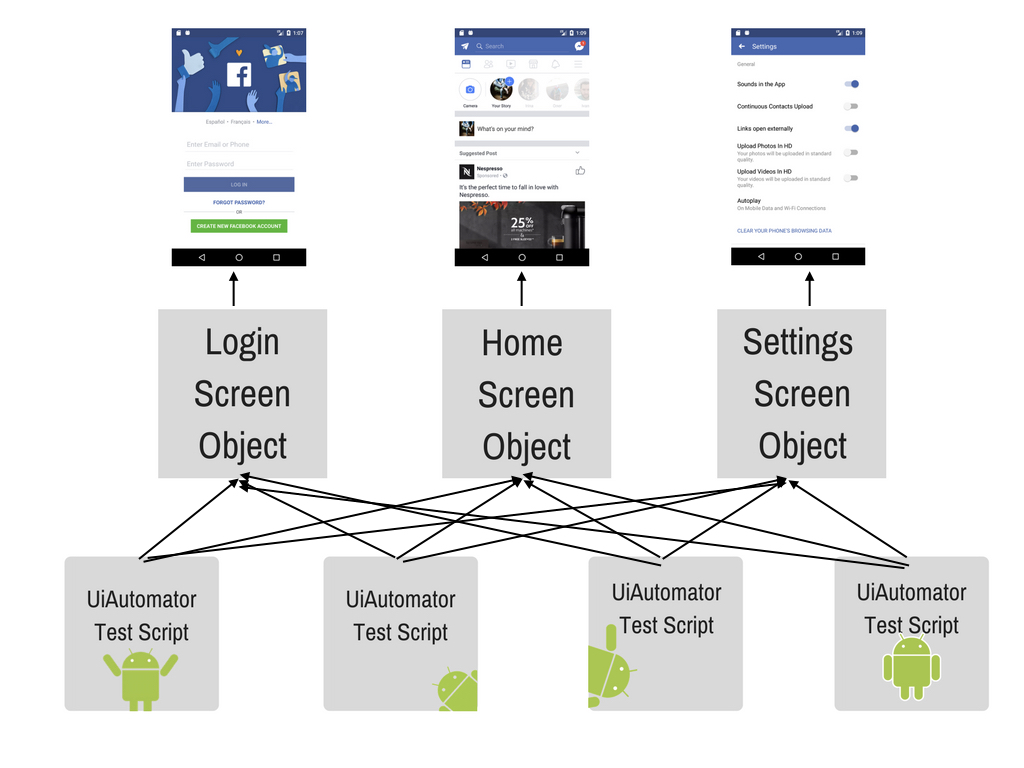
In the image above there are three pages (screens), and each of our Android tests can use any of them. Pretty cool, huh? Let’s figure out how to implement our own Page Object.
Test Setup
One of the best practices in development is code reducing and reusing. That said if repeatable actions are done in different classes, we’ll need to move them to their parent class. This way they’d be available to all of its descendants. This is also true for test classes. Since we’ll need to start the app before each test, I think, to move the setup method to BaseTest class would be a good idea.
@RunWith(AndroidJUnit4::class)
open class BaseTest {
 lateinit var device: UiDevice

@Before
fun setUp() {
  device = startDevice()
}
Full code snippet with startDevice method implementation can be found here.
Note: if you’re new to UiAutomator, check out my post on UiAutomator Essentials
Now we need to extend all of our test classes from this BaseTest class.
Creating Screen Object
As I said before for this example I created simple Calculator Android app.
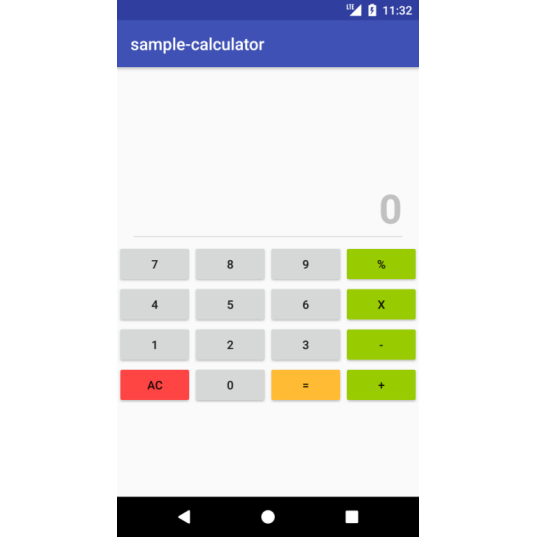
Page Object implementation should be straightforward since we’ll deal only with one view (screen) - Calculator. Let’s create this class.
class Calculator(device: UiDevice)
                    : BaseScreen(device) {

 private val plusButton = By.res("$id/button_add")
 private val multiplyButton = By.res("$id/button_multi")
 private val equalButton = By.res("$id/button_calc")
 private val resetButton = By.res("$id/button_all_clear")
 private val screen = By.res("$id/field")
 private val numberPattern = "$id/button_%s"

 val numberOnScreen: Int
    get() = find(screen).text
        .replace(delimiterRegex, "")
        .toInt()

 fun enter(number: Int): Calculator {
  inputNumber(number)
  return this
 }

 fun plus(number: Int): Calculator {
  click(plusButton)
  inputNumber(number)
  click(equalButton)
  return this
}

 fun multiply(by: Int): Calculator {
  click(multiplyButton)
  inputNumber(by)
  click(equalButton)
  return this
 }

 private fun inputNumber(number: Int) = number
           .toString()
           .toCharArray()
           .forEach {
            click(By.res(format(numberPattern, it)))
           }

 fun reset(): Calculator {
  click(resetButton)
  return this
 }
}
Complete implementation can be found here.
As was mentioned before we gathered all UI elements’ locators (plusButton, resetButton etc.) belonging to this particular page in this class as variables. Also all UI interactions on the app screen like plus, enter or reset were encapsulated here.
Now pay attention to this line:
class Calculator(device: UiDevice)
                    : BaseScreen(device) {
...
This snippet says that Calculator class extends from BaseScreen class and passes UiDevice instance to its superclass. Passing device instance in constructor of Page Object is considered to be the common practice in constructing Page Objects, since we’re separating tests and app logic. But creating of BaseScreen is optional, that’s something I like to do to encapsulate all common actions which can be done with any screen. Remember, we did something similar with BaseTest?
BaseScreen example:
abstract class BaseScreen(private val device: UiDevice) {
 val id = "${InstrumentationRegistry.getTargetContext().packageName}:id"
 fun find(by: BySelector): UiObject2 = device.findObject(by)
 fun click(by: BySelector) = find(by).click()
}
Usually I place all device interactions (f.e. click, find, isElementVisible or dragAndDrop) here. Also it’s not a bad idea to store common to all pages constants here.
How to find locators
Let’s talk about locators a bit. There are different types of them. I recommend to use By.res, which creates selector for resourceId. That’s the fastest and the most tolerant to changes type. If your app’s elements do not have ids, I would ask developers to add them if I were you. Only if that’s not the case I would use other locators as By.clazz, By.text, By.desc etc. But how do we find them?
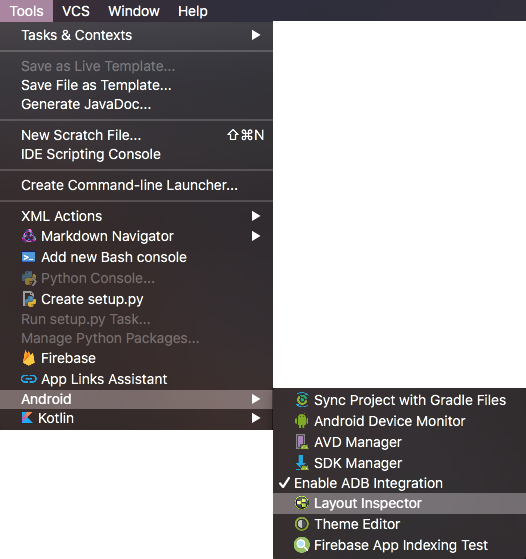
Actually Android Studio ships with great prebuilt tool - Layout Inspector.
To enable it open app on your device and then go to Tools > Android > Layout Inspector
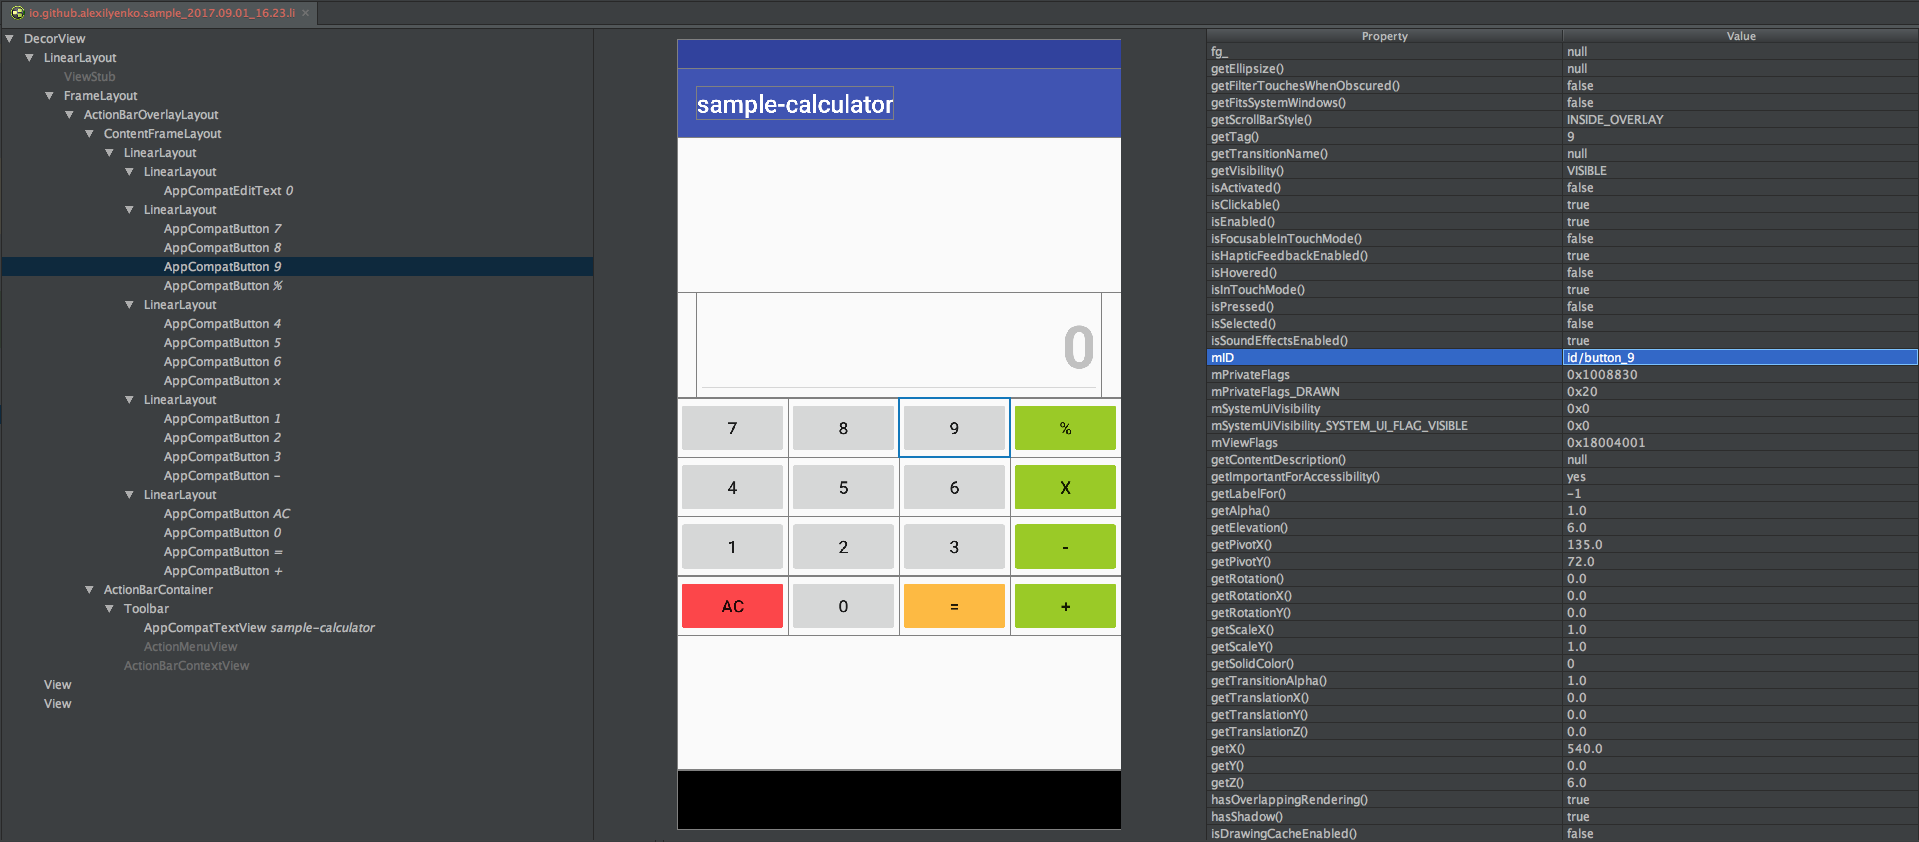
With Inspector’s help you can find any element in your app’s hierarchy, retrieve its text or check its attributes in Live mode. For instance to find resourceId of element simply check mID property value.
Implementing Tests
Now when we have Page Objects the last thing to do is to create tests. Remember the test from the first paragraph? Now it will look like this:
@Test
fun plus() {
 val firstNumber = randomNumber
 val secondNumber = randomNumber

 val calculator = Calculator(on = device)
            .enter(firstNumber)
            .plus(secondNumber)

 assertEquals(calculator.numberOnScreen,
                          firstNumber + secondNumber)
}
Notice how readable it’s become. You can guess what test do by simply reading the lines. Isn’t that the result we were looking for?
We don’t care about locators and device interaction in tests anymore. If anything changes we will modify our Calculator class and won’t touch our tests at all.
Besides that we’ve got test data separation as a big bonus! Take a look how we operate with randomNumbers, not bothering what the numbers are really are. They are not hardcoded anymore, which means we’re able to create data driven tests. Sounds great, doesn’t it?
Best Practices
Now when we know what Page Object is and how it can be utilized in our project let’s dive into more advanced techniques and best practices of development with it.
-
Test Logic. There’s generally a good advice to keep all your test logic (including assertions) away from Page Objects. I have a thumbs-up rule how to check that. If your Page Objects can be used without any test frameworks (JUnit, TestNG, etc.), then you’re good, if not - it’s time to reconsider your design.
-
Reusable elements. If several app views contain same widget or menu it’s always a good move to create separate object for the common element or extend both page objects from one superclass with extracted common logic.
BaseScreenis a good candidate for storing applicable to all of your app’s views logic. - Chain Methods. Chain methods are considered industry standard in designing Page Objects since they allow you to write automated tests in the fashion you write your usual test cases. For example:
 calculator
         .enter(number)
         .plus(number)
         .multiply(by = number)
The fact that all of my public methods return the current instance allowed me to write tests as steps.
You can return other Page Objects as well when transition between them happens:val loginScreen: LoginScreen = openApp() val home: HomeScreen = loginScreen.loginAs(defaultUser) - Waits. In the examples above test flow looked simple, but the real world apps usually have dynamic elements and complicated animations. We can not be sure that output we expect is always there after action was done. That said in most cases we have to wait for some elements to appear, disappear, change or have some attribute.
This is especially true for the transitions between pages. Thus another best practice is to wait until your view is opened in constructor of your Page Object class like this:init { waitUntilVisible(element = someElement, timeout = someTimeout) }In case if element is not displayed during given timeout, your test will fail with the exception and appropriate message. I wrote a whole post about Waits in UiAutomator and if you’re interested in building sophisticated automation framework with this tool, I recommend to read it.
- Parallel run. Final thing among advanced techniques would be simultaneous run of your tests on multiple devices. It will significantly decrease amount of time needed for your tests to run and help to get faster feedback about any potential problems. I wrote a post about Parallel Run of Android Tests, so if you’re interested, please take a look.

Comments